Decorating Your Christmas Tree - Ideas, Tips & Tricks
- Sandy
- Nov 26, 2023
- 3 min read
Let It Glow!!!

Here Are Some Christmas Tree Decorating Ideas, Tips & Tricks!
I earn a commission if you make a purchase from any of the links in this article - but it doesn't cost you a thing! (Woot woot!) It's just a great way to say,"Thanks for the help!"
Looking for some Christmas tree decorating ideas? You've come to the right place! Here's everything you'll need to know, in order, to get the gorgeous Christmas tree you've always wanted.
Step 1
The first thing you'll want to do is put your lights on the tree, if it isn't pre-lit. Then you'll want to add any ribbon that you want to add on the tree. This year I've gone with a red ribbon that is wrapped around the tree. I have two types of deep red ribbons wrapping horizontally around the tree. One has beautiful writing on it and the other is a soft red velvet. Don't be afraid to use different ribbons in the same color palette. I've even used another red ribbon as a bow for the tree topper. We use an artificial tree and as you can see below, it looks a little sparse at the beginning, but it won't stay that way! If you can afford a more robust tree - go for it! The more branches, the better it will look. But, as you'll see, you can do wonders, even with a less-expensive option! Here are some great options with a large variety of price points that will be delivered right to your door. No strapping a tree to your roof and wondering if it's going to go airborn before you get home!

Adding Ornaments To The Christmas Tree
Step 2
Next, grab your tote full of ornaments and add them to the tree. If you don't have ornaments, or want some new options to play with, I've placed lots of options below. Put the larger ornaments near the bottom, or use them to hide gaps in the branches. Place smaller ornaments and any heavy ornaments up top where the branches are a little less flexible. Be sure to keep any glass oraments up higher and away from any pets or kiddos. Use a mix of vintage ornaments, new ornaments, glass, shatter-proof, and cute character ornaments. Don't be afraid to use beautiful store-bought ornaments and ornaments that have a lot of sentimental value. Fill up the tree with lots of textures, sparkle, shine, and shapes. The ornament on the left below is over 70 years old and I love putting it on my tree every year. The ornaments in the middle are a mix of glass and shatterproof. These red ornament options will give you tons of texture and shine! These white ornaments have a great variety of styles, textures, glitter, and dimension. On the right, there's a great metal ornament that I bought about 10 years ago, and it still looks amazing on the tree. Here are some beautiful metal ornaments that will give you some amazing color and texture. I've used several beautiful icicle ornaments on my tree that provide a different shape and create visual interest. Don't be afraid to mix it up!


Adding Your Floral Picks
Step 3
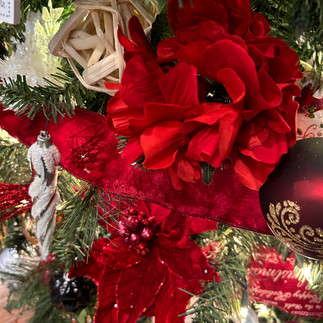
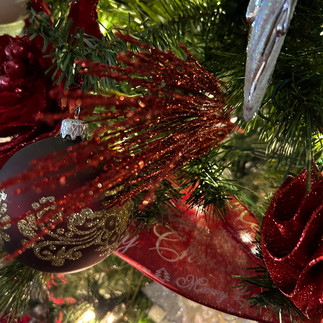
The next step is to add florals - which is not something everyone thinks to do! The best option is to use floral picks. They are just the right length, and will add tremendous beauty and fullness to your tree. Amazon has an amazing variety of floral stems to choose from. Choose floral picks with a variety of textures, colors, and materials. See the photos below for examples. As you can see, I've used red hydrangeas, red poinsettias, two different types of white poinsettias, gold berries, white berries, a cute white owl pick, a glittery, sparkly red pick. You can see just how full the tree is getting! It looks absolutely luxurious! This is also the time to add any bows to the tree that you'd like to use to fill spaces and add some additional texture. I was running a little short on time this year, and didn't want to go through the process of making bows, but they are gorgeous on a tree! These bow-making tools make the task so much easier, as bows can easily come apart in the process, and end up being a frustration. And, this should be fun!! :)


Final Looks!
Here's the video of the tree after it's completely finished. If you use these tips and tricks, tag me in a video of it on social media - I'd love to see it! Check out the home page to follow me on your favorite social media channel!

